
HVAC Emergency Repair Checklist for Homeowners
Use this HVAC emergency repair checklist to act quickly when your system fails. Ensure safety and get your home comfortable in no time!
HVAC Emergency Repair Checklist for Homeowners
An HVAC emergency repair checklist is a step-by-step safety and diagnostic tool that homeowners and tenants use when their heating or cooling system fails without warning. The right checklist separates a dangerous situation from a fixable one in minutes. It covers everything from gas leak evacuation to thermostat battery checks, circuit breaker resets, and filter replacements. Following a structured process reduces panic, prevents costly mistakes, and gets your home back to a safe temperature faster than guessing your way through the problem.
1. What immediate safety checks should you perform first?
Safety comes before diagnostics. Emergency triage starts with protecting the people in your home, not with fixing the equipment.
Run through these checks the moment your system fails:
- Gas leak: If you smell rotten eggs or sulfur, do not touch any switches or outlets. Evacuate immediately and call 911 from outside. A spark from a light switch can ignite gas.
- Carbon monoxide alarm: Leave the home right away if your CO detector sounds. Call emergency services from outside. CO is odorless and can incapacitate you before you realize there is a problem. Learn more about carbon monoxide sources in your home.
- Burning or plastic smell: This signals an electrical fire risk. Shut off power to the HVAC unit at the circuit breaker and do not restart it.
- Visible sparks or smoke: Cut power at the main panel and call your utility company.
Do not attempt any repair if any of these hazards are present. Your only job at that point is to get everyone out safely.
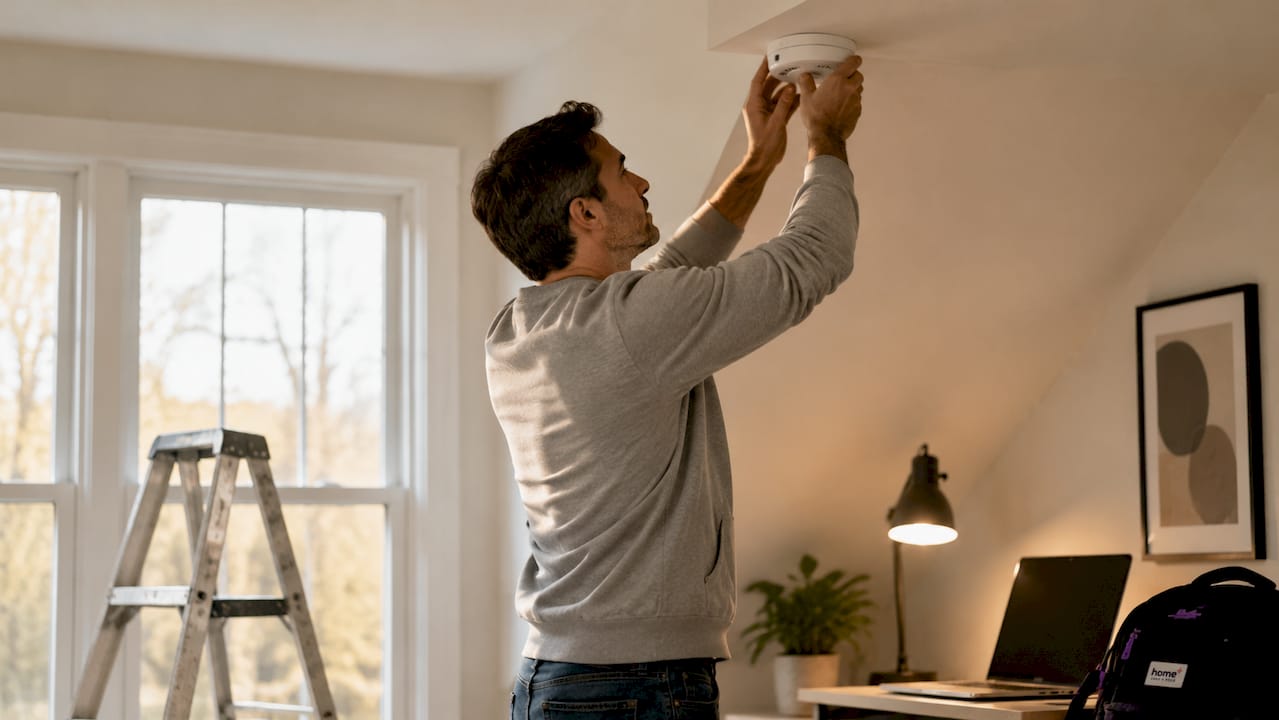
Pro Tip: Install a combination smoke and carbon monoxide detector within 10 feet of your HVAC air handler. It gives you the earliest possible warning for both electrical and combustion hazards.
2. Which simple diagnostic steps can you safely try?
Once you have confirmed there are no life-safety hazards, you can work through a short list of low-risk checks. Most HVAC failures have a simple cause that a homeowner can fix in under 10 minutes.
Follow these steps in order:
- Check the thermostat. Confirm it is set to the correct mode (heat or cool) and that the temperature setting is above or below the current room temperature. If the thermostat screen is blank, replace the batteries before assuming a bigger problem.
- Inspect the circuit breaker. Go to your electrical panel and look for a tripped breaker labeled “HVAC,” “AC,” or “furnace.” Reset it once by switching it fully off and then back on. If it trips again immediately, stop. Repeated breaker trips signal an electrical fault that requires a professional.
- Check and replace the air filter. A clogged filter blocks airflow and causes the system to overheat or freeze up. Pull the filter out and hold it up to light. If you cannot see light through it, replace it. This single step resolves a surprising number of service calls.
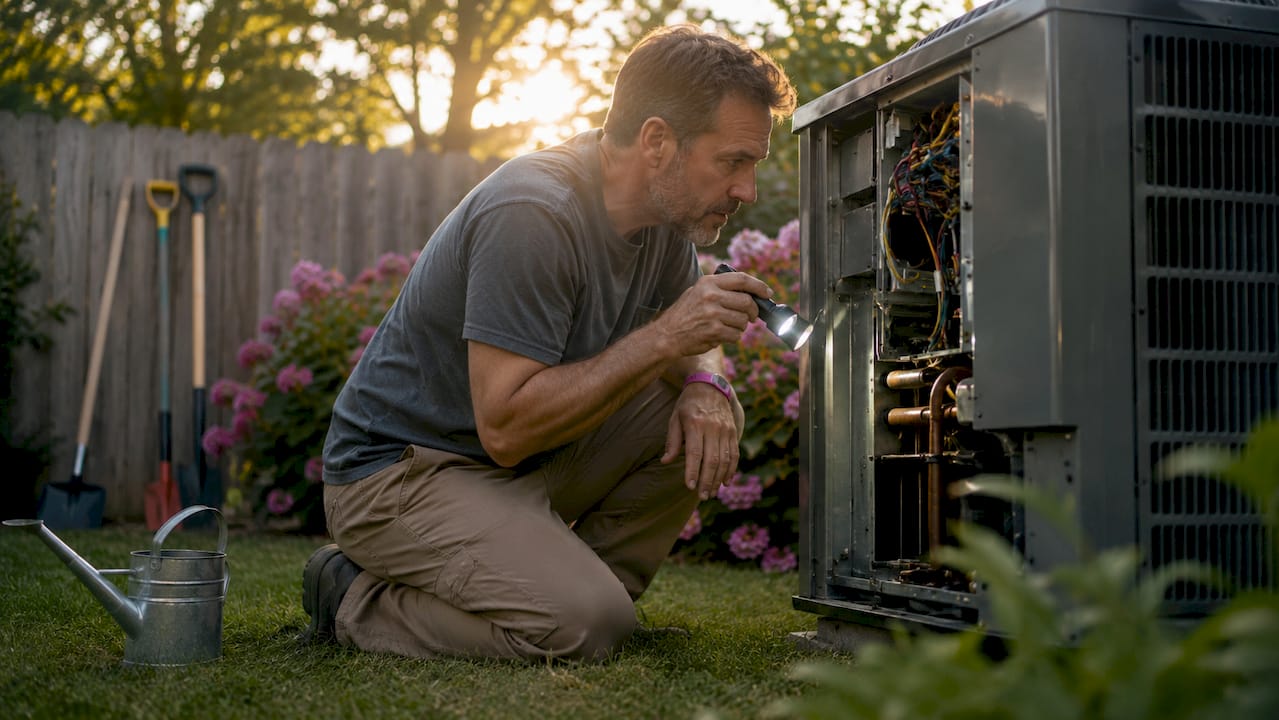
- Clear the outdoor condenser. Walk outside and look at your condenser unit. Clear debris and vegetation within about two feet of the unit. Leaves, grass clippings, and overgrown shrubs choke airflow and force the system to work harder.
- Document what you observe. Write down any error codes on the thermostat display, unusual sounds, smells, or the sequence of events before the failure. Detailed symptom notes help technicians diagnose the problem faster and arrive prepared with the right parts.
Pro Tip: Take a short video on your phone of any error codes, ice buildup, or unusual sounds before the technician arrives. A 30-second clip can cut diagnostic time significantly.
3. How to identify warning signs of serious HVAC failure
Some symptoms tell you the system needs to be shut off immediately and a professional called. Running a failing system past these warning signs causes expensive damage.
Watch for these red flags:
- Screeching, banging, or grinding noises. These sounds mean a mechanical component is failing. Unusual mechanical noises indicate imminent component failure and a risk of fire. Shut the system off and call a technician. For more detail on what each sound means, the Hometsair guide on AC noise diagnosis breaks it down clearly.
- Ice on the coils or refrigerant lines. Ice buildup means the system has lost airflow or refrigerant pressure. Running a system with ice buildup risks expensive compressor damage. Turn it off and let it thaw before calling for service.
- Water pooling around the indoor unit. This points to a blocked condensate drain line. Left unaddressed, it causes water damage to floors, walls, and ceilings.
- Warm air from the vents in cooling mode. If the system runs but blows warm air repeatedly, the refrigerant charge is likely low or the compressor is failing.
- Short cycling. If the system turns on and off every few minutes without reaching the set temperature, this is a critical failure symptom. It strains the compressor and drives up energy costs.
- Hissing near refrigerant lines. A hissing sound near the indoor or outdoor unit often signals a refrigerant leak. Refrigerant leaks require an EPA-certified technician. Do not attempt to handle refrigerant yourself.
If your system shows any of these signs, shut it off at the thermostat and call a professional. The cost of a service call is far lower than a compressor replacement.
4. What to do while waiting for the technician
Your HVAC is off and help is on the way. Your job now is to keep everyone in the home safe and reasonably comfortable until the technician arrives.
In winter (heating failure):
- Close curtains and room doors to trap heat in the rooms you are using.
- Use an approved electric space heater in the room where vulnerable occupants (infants, elderly adults, or pets) are staying.
- Layer clothing and use blankets to reduce the need for supplemental heat.
In summer (cooling failure):
- Close blinds and curtains on sun-facing windows to block radiant heat.
- Avoid using the oven, dishwasher, or clothes dryer. These appliances add significant heat to the home.
- Run ceiling fans counterclockwise to push cool air down.
- Stay hydrated and check on elderly family members and pets frequently.
Outdoor temperatures above 90°F or below freezing create emergency status because indoor temperatures become unsafe quickly for vulnerable occupants. If you cannot maintain a safe indoor temperature, call for emergency service rather than waiting for a scheduled appointment.
5. How proactive maintenance prevents HVAC emergencies
The best HVAC emergency is the one that never happens. A consistent preventive maintenance checklist for rentals and owner-occupied homes alike cuts emergency calls dramatically.
Key habits that protect your system:
- Replace air filters on schedule. For most homes, that means every 1–3 months. Rental properties with multiple occupants or pets need monthly checks. A clean filter is the single cheapest form of HVAC preventive maintenance available.
- Schedule seasonal tune-ups early. Book HVAC maintenance 2–4 weeks before seasonal transitions. Scheduling in early spring before cooling season and early fall before heating season means you avoid the rush when demand peaks.
- Inspect the thermostat and circuit breaker periodically. A thermostat that reads incorrectly or a breaker that trips occasionally is a warning sign, not a minor annoyance.
- Keep the outdoor unit clear year-round. Check it after storms, leaf fall, and lawn maintenance. Two feet of clearance on all sides is the standard.
- Adopt energy-saving HVAC habits. Programmable or smart thermostats like the Ecobee or Honeywell Home T6 Pro reduce runtime and wear. Fewer hours of operation means fewer emergency failures. For more on reducing energy costs, the Hometsair resource on AC energy efficiency is worth reviewing.
| Maintenance task | Frequency |
|---|---|
| Air filter replacement | Every 1–3 months |
| Outdoor unit clearance check | Monthly and after storms |
| Thermostat calibration check | Each season |
| Professional seasonal tune-up | Twice per year |
| Condensate drain flush | Once per year |
DIY diagnostics should stay limited to safe tasks like filter checks, thermostat batteries, breaker resets, and clearing airflow obstructions. Sealed system repairs always require a licensed technician.
Key Takeaways
A working HVAC emergency repair checklist starts with safety evacuation, moves through simple homeowner diagnostics, and ends with knowing exactly when to stop and call a professional.
| Point | Details |
|---|---|
| Safety first, always | Evacuate for gas leaks or CO alarms before attempting any diagnostic step. |
| Simple fixes resolve most calls | Thermostat batteries, tripped breakers, and clogged filters cause the majority of HVAC failures. |
| Shut off before damage spreads | Ice buildup, refrigerant hissing, and grinding noises require immediate system shutdown. |
| Document symptoms for technicians | Notes and videos of error codes and sounds cut diagnostic time and improve repair accuracy. |
| Prevention beats emergency response | Scheduling seasonal tune-ups 2–4 weeks early and replacing filters monthly prevents most emergency calls. |
What I have learned from working through HVAC emergencies
The checklist matters most in the first five minutes. That is when homeowners make the most expensive mistakes, either by ignoring a serious warning sign or by attempting a repair that makes things worse.
The most underrated step on any emergency checklist is documentation. Technicians consistently say that a homeowner who can describe the sequence of events, share a photo of the error code, and point to where the noise was coming from cuts the diagnostic visit in half. That detail is not just helpful. It is the difference between a one-hour fix and a two-visit repair job.
The other thing I have seen repeatedly: people reset the circuit breaker two or three times before calling for help. That habit causes real damage. One reset is diagnostic. Two or more resets are a gamble with your compressor and your wiring.
My honest recommendation is to combine this checklist with a twice-yearly seasonal inspection. The checklist handles the emergency. The inspection prevents it. Most Long Island homeowners skip the spring tune-up and then call for emergency service in july when every technician in Nassau County is booked out. Book early, keep the filter clean, and you will rarely need the emergency checklist at all.
— Blake
Hometsair is ready when your HVAC needs help fast
When the checklist runs out and the problem is beyond a filter swap or breaker reset, you need a technician who shows up the same day and fixes it on the first visit.
Hometsair serves Long Island homeowners with NATE-certified technicians, zero overtime fees, and a 90% first-visit fix rate. Whether your AC is making a grinding noise, your heat stopped working overnight, or you need a seasonal tune-up before the next weather extreme hits, Hometsair has same-day availability across Nassau County. Check HVAC services in Atlantic Beach or Baldwin to book your visit, or call directly for emergency dispatch.
FAQ
What does an HVAC emergency repair checklist include?
An HVAC emergency repair checklist covers safety checks for gas leaks and carbon monoxide, thermostat and battery inspection, circuit breaker reset, air filter replacement, and outdoor unit clearance. It also includes guidance on when to shut the system off and call a licensed technician.
What are the signs your HVAC needs immediate repair?
Screeching, banging, or grinding noises, ice on the coils, water pooling around the indoor unit, and a system that short cycles every few minutes all signal that the HVAC needs immediate professional attention.
How often should air filters be replaced in rental properties?
Rental properties with multiple occupants or pets should have filters checked monthly and replaced every 1–3 months. Regular filter replacement is the most cost-effective preventive maintenance step available to tenants and landlords.
When does an HVAC failure become a true emergency?
Outdoor temperatures above 90°F or below freezing make any HVAC failure an emergency because indoor temperatures become unsafe quickly, especially for infants, elderly adults, and pets.
Can I reset my HVAC circuit breaker more than once?
Reset the breaker once only. If it trips again immediately, stop and call a professional. Repeated resets signal an electrical fault that can damage the compressor or create a fire hazard.