
HVAC Installation Process Explained: Your 2026 Guide
Learn the HVAC installation process explained in simple steps. Understand key phases to avoid surprises and ensure efficient heating and cooling.
HVAC Installation Process Explained: Your 2026 Guide
The HVAC installation process is a structured sequence of site assessment, load calculation, permitting, equipment placement, ductwork adjustment, and final system commissioning designed to deliver code-compliant, efficient heating and cooling. Homeowners who understand this workflow avoid costly surprises, set realistic expectations for timelines, and hold their contractors accountable at every phase. The full process follows industry standards including Manual J, Manual S, and Manual D, each of which governs a specific stage of the work. Skipping any step creates performance problems that show up in your energy bills and comfort levels for years.
What are the main steps in the HVAC installation process?
The HVAC installation process follows a defined workflow that experienced contractors execute in sequence. Each phase builds on the last, and cutting corners at any point creates problems downstream.
-
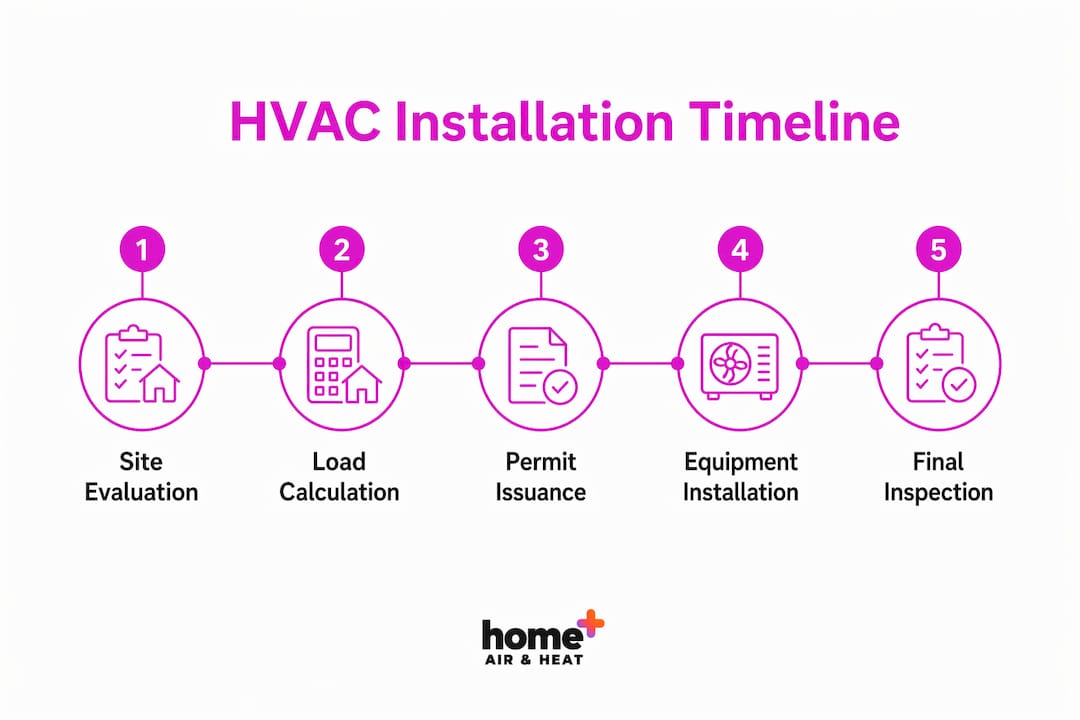
Site evaluation and load calculation. The technician measures your home’s square footage, insulation levels, window count, and local climate data. This feeds into a Manual J load calculation, which determines exactly how much heating and cooling capacity your home needs. Skipping this step is the single most common cause of oversized or undersized systems.
-
Equipment selection. Using the Manual J results, the contractor applies Manual S guidelines to select specific equipment models. Manual S cross-references manufacturer performance data against your calculated load to confirm the chosen unit will actually deliver the right output under your local conditions.
-
Permit application. The contractor submits plans to your local Authority Having Jurisdiction (AHJ). Permit issuance can take anywhere from 24 hours to 3 weeks depending on your municipality. Work should not begin until the permit is approved.
-
Old system removal. Technicians disconnect refrigerant lines, electrical connections, and ductwork before removing the existing equipment. Refrigerant must be recovered by an EPA-certified technician, not vented to the atmosphere.
-
New equipment placement and connections. The indoor air handler or furnace goes in first, followed by the outdoor condenser. The condenser sits on a concrete or composite pad. Proper pad installation requires a level foundation extending at least 4 inches beyond the unit base to prevent vibration and premature corrosion.
-
Ductwork inspection and modification. The technician inspects existing ducts for leaks, blockages, and sizing issues using Manual D principles. Sealing and insulating ducts at this stage can improve system efficiency by about 20%.
-
Electrical and refrigerant line connections. The lineset connects the indoor and outdoor units and carries refrigerant between them. Electrical connections are made to the breaker panel, and the system is wired to the thermostat.
-
System startup, calibration, and testing. The technician checks refrigerant charge, static pressure, and temperature splits to confirm the system performs within manufacturer specifications.
-
Final inspection. The local AHJ inspector visits to verify code compliance. The permit closes once the inspection passes.
Pro Tip: Ask your contractor for a copy of the Manual J calculation before any equipment is ordered. If they cannot produce one, that is a red flag worth acting on.
How long does HVAC installation typically take?
Installation timelines vary significantly based on system type, home complexity, and local permitting speed. Understanding the ranges helps you plan around the work and avoid being caught off guard.
A basic system replacement takes 4–8 hours for a straightforward swap with no ductwork changes. Full replacements that include duct modifications require 2–3 days of labor. Complex multi-zone installations with multiple indoor units can also reach 3 days.
| Phase | Typical Duration |
|---|---|
| Site evaluation and load calculation | 1–3 hours |
| Permit issuance | 24 hours to 3 weeks |
| Equipment removal and installation | 4–8 hours (simple) / 1–2 days (complex) |
| Ductwork modifications | 1–2 additional days |
| AHJ inspection after installation | 7–14 days |
Permitting is the phase that surprises homeowners most. Permit issuance times range from 24 hours to 3 weeks, and inspections typically occur 7–14 days after installation completes. That gap means your system may be running before it receives official sign-off, which is normal as long as the permit was pulled before work began.
Unforeseen problems extend timelines further. Duct leakage or corroded electrical panels can add 1–5 business days due to required repairs and re-inspection. Experienced contractors flag these risks during the site evaluation, but some issues only surface once walls are opened.
- Homes without existing ductwork require full duct design and installation, which adds 2–5 days.
- Older homes with knob-and-tube wiring often need an electrician before HVAC work can proceed.
- Coastal properties on Long Island face salt-air corrosion on existing components, which can require additional prep time before new equipment goes in.
Check your HVAC installation checklist before scheduling to identify potential delays early.
What technical standards make an HVAC installation effective?
Three industry standards govern quality HVAC installations: Manual J, Manual S, and Manual D. Each addresses a different phase of the work, and all three are required for a code-compliant installation in most jurisdictions.

Manual J is the load calculation standard. It accounts for your home’s thermal envelope, including insulation, windows, air infiltration, and local climate data, to determine the exact BTU capacity your system needs. Skipping Manual J leads to poor humidity control, higher energy usage, and premature system failures. An oversized system short-cycles, meaning it turns on and off too frequently, which wears out components faster and leaves your home feeling clammy.
Manual S governs equipment selection. Once you have the Manual J output, Manual S tells the contractor which specific models will perform correctly under your local design conditions. A unit that looks right on paper can underperform in extreme heat or humidity if Manual S is not applied.
Manual D covers duct design. It specifies duct sizing, layout, and airflow to match the selected equipment. Sealed and insulated ducts designed per Manual D can improve system efficiency by about 20%. That number represents real money on your utility bill every month.
System startup and commissioning are where the installation either succeeds or fails. Even high-efficiency units fail without proper calibration of refrigerant charge, static pressure, and temperature splits. A technician who skips commissioning is essentially guessing that the system is set up correctly.
- Refrigerant charge must match manufacturer specifications exactly. Overcharging or undercharging reduces efficiency and damages the compressor.
- Static pressure testing confirms that airflow through the duct system is within design limits.
- Temperature split testing measures the difference between supply and return air to verify the system is transferring heat correctly.
Pro Tip: Request a written commissioning report from your installer. It should list measured refrigerant charge, static pressure readings, and temperature splits. This document also supports warranty claims if problems arise later.
Proper condenser pad installation is a detail that homeowners rarely think about but contractors should never skip. A stable, level pad with assured drainage is industry standard. An improper pad can void your equipment warranty and shorten the unit’s lifespan by accelerating vibration damage and corrosion at the base.
What should homeowners expect at the final inspection and walkthrough?
The final inspection and homeowner walkthrough are the last two steps of the HVAC installation process, and both carry real consequences if skipped or rushed.
The AHJ inspector visits your home to verify that the installation meets local building codes. This typically happens 7–14 days after installation. The inspector checks electrical connections, refrigerant line routing, equipment clearances, and ductwork. Once the inspection passes, the permit closes.
A closed permit is not just a formality. It is a document you will need when you sell your home. Buyers’ inspectors routinely check for open permits, and an unclosed HVAC permit can delay or kill a real estate transaction. Ask your contractor for the final signed permit documents and store them with your home records.
The homeowner walkthrough happens after installation and before the crew leaves. A quality installer covers:
- Thermostat programming, including how to set schedules and adjust modes
- Filter type, location, and recommended replacement intervals
- System alerts and error codes your thermostat may display
- Warranty registration steps and documentation
- Who to call if something goes wrong in the first 30 days
This walkthrough empowers you to catch issues early and extends system life by ensuring you maintain it correctly from day one. Treat it as mandatory training, not a courtesy. If your installer skips it, ask for it explicitly before signing off on the job. You can also review HVAC warranty details to understand what your coverage actually includes.
Key Takeaways
A successful HVAC installation depends on completing every phase in sequence, from Manual J load calculation through final permit closure, with no steps skipped.
| Point | Details |
|---|---|
| Load calculation comes first | Manual J sizing prevents oversized or undersized systems that waste energy and fail early. |
| Permitting adds real time | Permit issuance takes 24 hours to 3 weeks; plan your schedule around this phase. |
| Duct quality drives efficiency | Sealed and insulated ducts per Manual D can improve system efficiency by about 20%. |
| Commissioning is non-negotiable | Refrigerant charge, static pressure, and temperature splits must be measured and documented. |
| Closed permits protect resale value | Final signed permit documents are required for home sales and confirm code compliance. |
What installers get wrong and what you should watch for
After years of watching HVAC installations go sideways, the pattern is almost always the same. The technical work is fine. The preparation and communication are not.
The most common problem I see is contractors skipping the Manual J calculation entirely and sizing equipment by rule of thumb. One ton per 500 square feet sounds reasonable until you factor in a poorly insulated attic, large south-facing windows, or a coastal climate with high humidity. The result is a system that runs constantly in summer and still cannot keep up. The homeowner blames the equipment. The real problem was the sizing.
The second issue is condenser pad installation. I have seen units placed on cracked concrete slabs, gravel beds, and even compacted dirt. None of those meet the standard. A pad that shifts or settles puts stress on the refrigerant lines and electrical connections. It also voids most manufacturer warranties, which homeowners only discover when they file a claim.
The final walkthrough is where I think homeowners leave the most value on the table. Most people nod along and forget everything within a week. Write down the filter size, the replacement schedule, and the thermostat model number before the crew leaves. Take a photo of the commissioning report. These small steps save you real money when something goes wrong six months later.
The HVAC installation process is not complicated, but it requires every phase to be done in the right order by someone who knows what they are doing. The best thing you can do as a homeowner is ask questions, request documentation, and never let a contractor skip a step because it will “probably be fine.”
— Blake
Hometsair handles the entire installation process for you
Hometsair serves Nassau County homeowners with NATE-certified technicians who follow Manual J, Manual S, and Manual D at every installation. The team handles permits, coordinates AHJ inspections, and provides a full commissioning report before leaving your property.

Hometsair currently offers $1,000 off AC installations with zero overtime fees and same-day response across Long Island. Whether you need a straightforward system swap or a full installation in a home without existing ductwork, the team is equipped for coastal climate challenges including salt-air corrosion. Get a free quote for AC installation in Nassau County or check availability for AC installation in Roslyn and Cedarhurst. Every job includes warranty registration and permit handling from start to finish.
FAQ
What is the HVAC installation process?
The HVAC installation process is a structured sequence that includes site assessment, Manual J load calculation, permitting, equipment removal, new system placement, ductwork adjustment, electrical and refrigerant connections, commissioning, and final AHJ inspection. Each phase must be completed in order for the system to perform correctly and meet local building codes.
How long does a standard HVAC installation take?
A basic system replacement takes 4–8 hours, while full installations with ductwork modifications require 2–3 days. Permitting and inspection add additional time, with inspections typically scheduled 7–14 days after installation.
What is HVAC pad installation?
HVAC pad installation refers to placing the outdoor condenser unit on a stable, level concrete or composite foundation. The pad must extend at least 4 inches beyond the unit base to prevent vibration damage and corrosion, and an improper pad can void the equipment warranty.
Why does the Manual J calculation matter?
Manual J determines the exact heating and cooling capacity your home needs based on insulation, window area, and local climate. Skipping it leads to improper sizing, which causes poor humidity control, higher energy bills, and early system failure.
What happens during the final HVAC inspection?
The local AHJ inspector verifies that electrical connections, refrigerant line routing, equipment clearances, and ductwork meet building code. Once the inspection passes, the permit closes, and you receive documentation that confirms code compliance for future home sales.